Stain vs Paint: Best Way to Protect a Cedar Fence
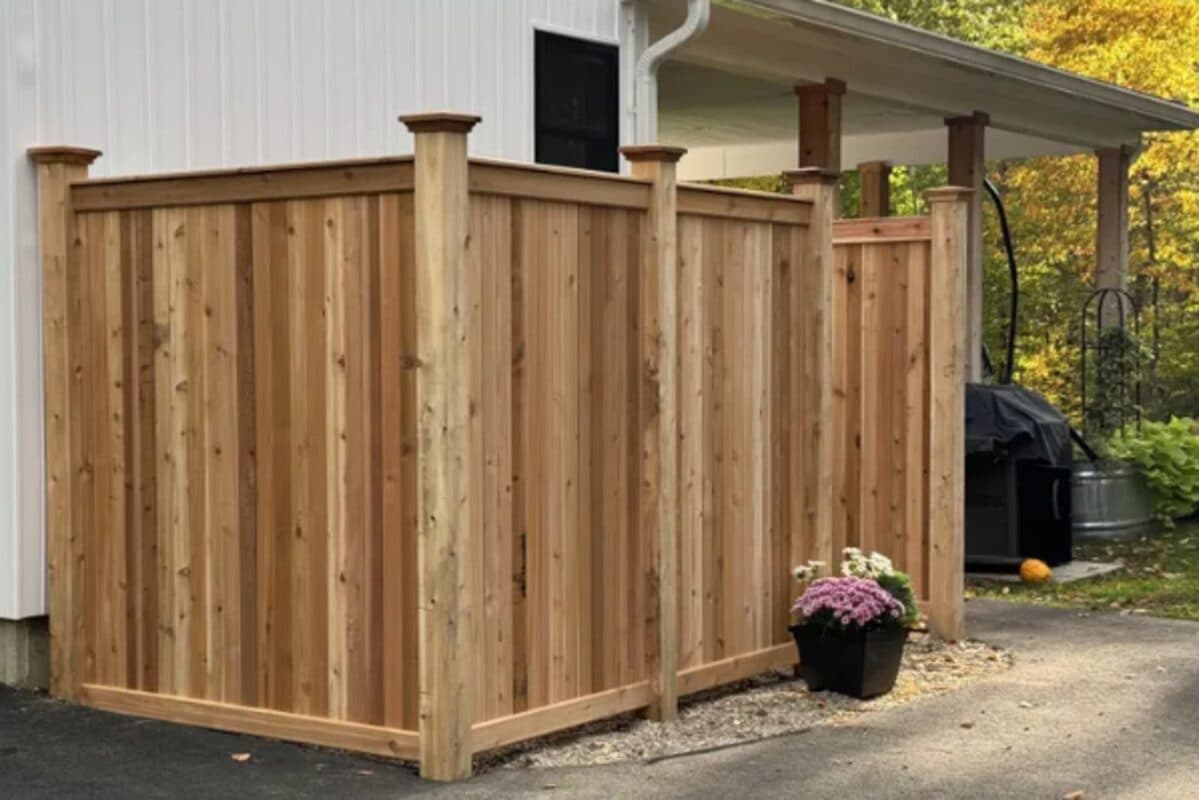
Cedar is one of the most beautiful fence materials you can install. It has warmth, character, and a natural look that fits Vancouver Island properties extremely well. But cedar is still wood — and wood outside in our climate needs care.
That is the part many homeowners underestimate. A cedar fence is not just an installation project. It is a maintenance program. If you keep up with it, cedar can age beautifully and last for years. If you ignore it, the same fence can turn grey, split, cup, grow mildew, and start breaking down much sooner than expected.
So what is the best way to protect it: stain or paint? The short answer is this: for most cedar fences on Vancouver Island, stain is the better choice. Paint can work in certain situations, but stain usually performs better on fences because it penetrates the wood, handles moisture better, and is easier to maintain over time.
Why Cedar Fences Need Protection
Cedar is naturally more rot-resistant than many other softwoods, but "rot-resistant" does not mean "maintenance-free." Vancouver Island gives wood fences a tough combination of conditions:
- Heavy rain and long damp seasons that keep boards wet for extended periods
- Shade and hedging that slow drying and encourage moss, algae, and mildew
- Summer UV exposure that breaks down the surface fibres and turns cedar grey
- Temperature swings that make boards expand, contract, check, and split
- Soil splash and irrigation that keep the bottom of boards and posts wetter than the rest of the fence
A finish does not make cedar invincible, but it slows the damage. It helps reduce moisture absorption, protects the surface from UV, and keeps the fence looking intentional instead of neglected.
Stain vs Paint: What Is the Difference?
The biggest difference is how each product behaves on wood.
Stain penetrates into the wood. Depending on the product, it can be transparent, semi-transparent, semi-solid, or solid. It lets some of the cedar grain show through and moves with the board as it expands and contracts.
Paint sits on top of the wood. It creates a surface film. That film can look clean and uniform when it is fresh, but once moisture gets behind it, paint can bubble, crack, and peel. On a fence — especially one exposed to rain from both sides — that is a real risk.
Why Stain Is Usually Better for Cedar Fencing
For fences, stain usually wins for four practical reasons.
1. Stain lets the wood breathe
Cedar moves. Boards swell when wet and shrink when dry. A penetrating stain allows that movement better than paint. Paint forms a harder shell, and when the wood moves underneath it, the coating can fail.
2. Stain is easier to maintain
When a stained fence needs maintenance, the process is usually straightforward: wash it, let it dry, and recoat it. When a painted fence fails, you may be scraping, sanding, priming, and repainting. That is a much bigger job.
3. Stain ages more gracefully
A stained cedar fence may fade over time, but it usually fades gradually. A painted fence often looks great until it does not — then the peeling and flaking become very visible.
4. Stain keeps the natural cedar look
Most people choose cedar because they like the look of wood. A semi-transparent or semi-solid stain protects the fence while still letting the grain show through. Paint covers that character completely.
When Paint Can Make Sense
Paint is not always wrong. It can make sense if the fence is already painted and the existing coating is still in decent condition. It can also make sense when a homeowner wants a very specific solid colour and understands the maintenance commitment.
But paint requires excellent prep. The wood must be clean, dry, and properly primed. Any peeling areas need to be scraped and sanded first. If paint is applied over damp cedar, dirty boards, mildew, or loose old coating, it will not last.
In our climate, we would not usually recommend painting a new cedar fence unless there is a strong design reason for it. For most homeowners, a high-quality exterior stain is the safer long-term choice.
Transparent, Semi-Transparent, Semi-Solid, or Solid Stain?
Not all stains perform the same. The more pigment a stain has, the more UV protection it usually provides.
| Finish Type | Look | Typical Maintenance Cycle | Best For |
|---|---|---|---|
| Clear / Natural | Most natural cedar look | Often 1–2 years | Homeowners who want the freshest cedar appearance and accept more upkeep |
| Semi-Transparent | Shows grain with added colour | Usually 2–3 years | Most cedar fences; good balance of beauty and protection |
| Semi-Solid | More colour, less grain | Usually 3–4 years | Older cedar or homeowners wanting more UV protection |
| Solid Stain | Paint-like colour, minimal grain | Usually 3–5 years | Weathered fences, colour changes, or a more uniform look |
If you want our practical recommendation, most new cedar fences do well with a quality semi-transparent exterior stain. It protects the wood without hiding why you chose cedar in the first place.
How Often Should You Stain a Cedar Fence?
On Vancouver Island, a cedar fence should usually be cleaned and inspected every year, then stained every 2–3 years. Some fences need it sooner. Some can go a little longer.
The timing depends on exposure:
- Full sun: more UV fading; stain may need refreshing sooner
- Heavy shade: more mildew and moisture; cleaning becomes more important
- Near hedges or sprinklers: slower drying and more organic growth
- South-facing sections: often fade faster than north-facing sections
- Bottom boards and post bases: usually wear first because of splashback and ground moisture
A simple test: splash a bit of water on the fence. If the water beads up, the finish is still doing its job. If it soaks in quickly and darkens the board, it is time to clean and recoat.
Best Practices for Staining a Cedar Fence
If you want the finish to last, prep matters more than the brand name on the can.
1. Wait for the right weather
Do not stain in the rain, on wet boards, or right before a storm. You want a dry stretch with moderate temperatures. Avoid direct hot sun if possible because stain can flash-dry before it penetrates properly.
2. Clean the fence first
Dirt, pollen, mildew, and algae prevent stain from bonding properly. Wash the fence with an appropriate wood cleaner, then rinse thoroughly. If you use a pressure washer, be careful — too much pressure can chew up cedar fibres and leave permanent marks.
3. Let the wood dry
This is where many DIY jobs fail. Cedar can look dry on the surface while still holding moisture inside. Give it enough time to dry after washing or rain. If the boards are damp, wait.
4. Repair before finishing
Replace broken boards, tighten loose fasteners, and address any sections that are holding water. Stain is protection, not a structural repair.
5. Apply evenly and back-brush
Spraying can be fast, but the stain still needs to be worked into the wood. Back-brushing helps even out the finish and improves penetration. Avoid heavy puddles or over-application — more product is not always better.
6. Pay attention to end grain
Board ends absorb water quickly. Any exposed cuts, tops, and ends deserve extra attention because they are common failure points.
Common Mistakes Homeowners Make
- Waiting too long. Once cedar is badly greyed, cracked, and rough, restoring it takes much more work.
- Staining dirty wood. If mildew is trapped under the finish, it will keep causing problems.
- Using paint because it seems more protective. On a fence, a surface film can become a peeling maintenance headache.
- Pressure washing too aggressively. Cedar is soft. A pressure washer can damage it quickly.
- Ignoring the shaded side. The side that gets less sun may actually need more cleaning because it stays damp longer.
- Choosing the cheapest product. Labour is the expensive part. Use a quality exterior product so the work lasts.
What If Your Cedar Fence Has Already Turned Grey?
Grey cedar is not automatically ruined. Grey usually means UV has weathered the surface fibres. If the boards are still solid, the fence can often be cleaned, brightened, and stained.
But there is a difference between weathered and failing. If boards are soft, splitting badly, pulling away from fasteners, or rotting near the bottom, stain will not bring them back. At that point, repairs or replacement may make more sense than investing time and money into a fence that is near the end of its life.
Our Honest Recommendation
If you already have a cedar fence and want it to last, maintain it. Clean it yearly, keep plants from trapping moisture against it, and plan to stain it every 2–3 years. For most fences, choose stain over paint unless the fence is already painted or you have a specific design reason.
If you are deciding on a new fence, be honest about how much maintenance you actually want to do. Cedar can be beautiful and cost-effective upfront, but it asks for ongoing care. If you do not want that maintenance program, vinyl or ProLine may be a better long-term fit.
That is not a sales pitch — it is the practical difference between materials. Some homeowners love cedar and enjoy maintaining it. Others want the fence installed once and left alone. The right answer depends on your budget, your property, and how you want to spend your weekends.
Need Help Choosing?
If you are planning a new fence on Vancouver Island, use our free estimate builder to compare options, or contact us for a site visit. We will look at your yard, exposure, privacy needs, and maintenance expectations, then recommend the fence type that actually fits your situation.
Ready to Get Started?
Use our free estimate builder to see pricing for your project, or contact us for a site visit.